Maple Peach Blackberry Crisp

I love enjoying warm summer nights with a bubbly stone fruit crisp with a heaping scoop of creamy vanilla ice cream! This easy fruit crisp is the perfect way to use the ripe berries and/or juicy stone fruit you have on hand. I’ve experimented with quite a few different types of toppings and I have to say, this one might be my favorite. It’s swirled with notes of brown butter, and sweetened with maple syrup and a touch of brown sugar. Make this ahead of time for an al fresco dinner party - stick it in the oven right as you’re finishing dinner and trust me, your dinner guests will impressed.

I saw peaches and plums at the farmers’ market and had to jump on it. I love eating summer foods.. from sweet tomatoes to crisp herbs to luscious peaches, I want it ALL. I couldn’t resist. I’ve used peaches in arugula salads with grilled steak, topped my yogurt granola bowls with them and now am baking with them as much as possible. My go-to is a berry crisp but adding peaches and these extra juicy plums added such great texture and flavor, try it!

I saw peaches and plums at the farmers’ market and had to jump on it. I love eating summer foods.. from sweet tomatoes to crisp herbs to luscious peaches, I want it ALL. I couldn’t resist. I’ve used peaches in arugula salads with grilled steak, topped my yogurt granola bowls with them and now am baking with them as much as possible. My go-to is a berry crisp but adding peaches and these extra juicy plums added such great texture and flavor, try it!

This process is super simple. Start with the fruit tossed together with brown sugar and vanilla. In the past, I’ve added some acidity like a pixie orange or Meyer lemon but I wanted to keep this one extra sweet and rich so I used vanilla only.Then add a touch of cornstarch to make the thick and juicy sauce. I’ve used flour in the past which works, but I like the texture of the cornstarch better.When the peaches bake down and the blackberries are roasted it creates the most incredible almost caramel-like sauce! The crisp topping for me is KEY. I like it chewy but still crispy, not soggy. You’ll use flour, oats, cinnamon, brown sugar and the secret is some brown butter. Sprinkle the crumble over the fruit, bake and then about an hour later you’ll have the most perfect crisp. It’s like a crisp brown sugar cookie and I can’t get enough of it.

This process is super simple. Start with the fruit tossed together with brown sugar and vanilla. In the past, I’ve added some acidity like a pixie orange or Meyer lemon but I wanted to keep this one extra sweet and rich so I used vanilla only.

Then add a touch of cornstarch to make the thick and juicy sauce. I’ve used flour in the past which works, but I like the texture of the cornstarch better.

When the peaches bake down and the blackberries are roasted it creates the most incredible almost caramel-like sauce!

The crisp topping for me is KEY. I like it chewy but still crispy, not soggy. You’ll use flour, oats, cinnamon, brown sugar and the secret is some brown butter. Sprinkle the crumble over the fruit, bake and then about an hour later you’ll have the most perfect crisp. It’s like a crisp brown sugar cookie and I can’t get enough of it.

IMG_1491.jpg
INGREDIENTS- 4-5 peaches, sliced - 3 cups fresh blackberries - 1/2 cup brown sugar - 1 tablespoon + 1-2 teaspoons cornstarch - 1 tablespoon vanilla extractTOPPING- 1 cup all purpose organic flour - 1/2 cup old fashioned oats - 1/2 brown sugar - 1 teaspoon cinnamon - 12 tablespoons cold salted grass-fed butter - 4 tablespoons maple syrupINSTRUCTIONS1. Preheat the oven to 350 degrees2. Mix together peaches, blackberries, brown sugar, cornstarch, and vanilla. Spread the fruit out into a 10-12 inch baking dish or cast iron skillet3. For the topping, combine the oats, flour, brown sugar, 1/2 teaspoon cinnamon, and salt in a medium bowl. Then add 8 tablespoons of cold butter into the dry ingredients and mix with your hands (or use fork). Sprinkle over the fruit. Cover with foil and bake for 30 minutes.4. While it’s baking, add 4 tablespoons of butter to a small pot and set over medium heat. Let the butter to brown lightly until it smells toasted, about 3-4 minutes. Remove from the heat and whisk in the maple syrup, 1/2 teaspoon cinnamon, and a pinch of salt. Remove the crisp from the oven and drizzle the maple butter over the crisp then bake for another 30 minutes uncovered. 5. Slightly cool then serve with vanilla ice cream!

INGREDIENTS

- 4-5 peaches, sliced
- 3 cups fresh blackberries
- 1/2 cup brown sugar
- 1 tablespoon + 1-2 teaspoons cornstarch
- 1 tablespoon vanilla extract

TOPPING

- 1 cup all purpose organic flour
- 1/2 cup old fashioned oats
- 1/2 brown sugar
- 1 teaspoon cinnamon
- 12 tablespoons cold salted grass-fed butter
- 4 tablespoons maple syrup

INSTRUCTIONS

1. Preheat the oven to 350 degrees

2. Mix together peaches, blackberries, brown sugar, cornstarch, and vanilla. Spread the fruit out into a 10-12 inch baking dish or cast iron skillet

3. For the topping, combine the oats, flour, brown sugar, 1/2 teaspoon cinnamon, and salt in a medium bowl. Then add 8 tablespoons of cold butter into the dry ingredients and mix with your hands (or use fork). Sprinkle over the fruit. Cover with foil and bake for 30 minutes.

4. While it’s baking, add 4 tablespoons of butter to a small pot and set over medium heat. Let the butter to brown lightly until it smells toasted, about 3-4 minutes. Remove from the heat and whisk in the maple syrup, 1/2 teaspoon cinnamon, and a pinch of salt. Remove the crisp from the oven and drizzle the maple butter over the crisp then bake for another 30 minutes uncovered.

5. Slightly cool then serve with vanilla ice cream!

Print Friendly and PDFPrint Friendly

Elevated Chicken Salad

You guys.. it’s Memorial Day Weekend and we’re firing up the grill early! We stocked up at Pacific Health Foods so we don’t have to shop this weekend. Don’t get me wrong, I love a good BBQ with friends but what I love even more is being able to actually enjoy people (without hanging out by the grill all afternoon). So here’s my solution! Pre-make this bomb chicken salad the night before or even a few days prior to having your guests over, then you can make some appetizers, a big salad and some cocktails and spend quality time with your people! I know, chicken salad might not sound exciting but this recipe kicks things up a notch - it’s a winner.

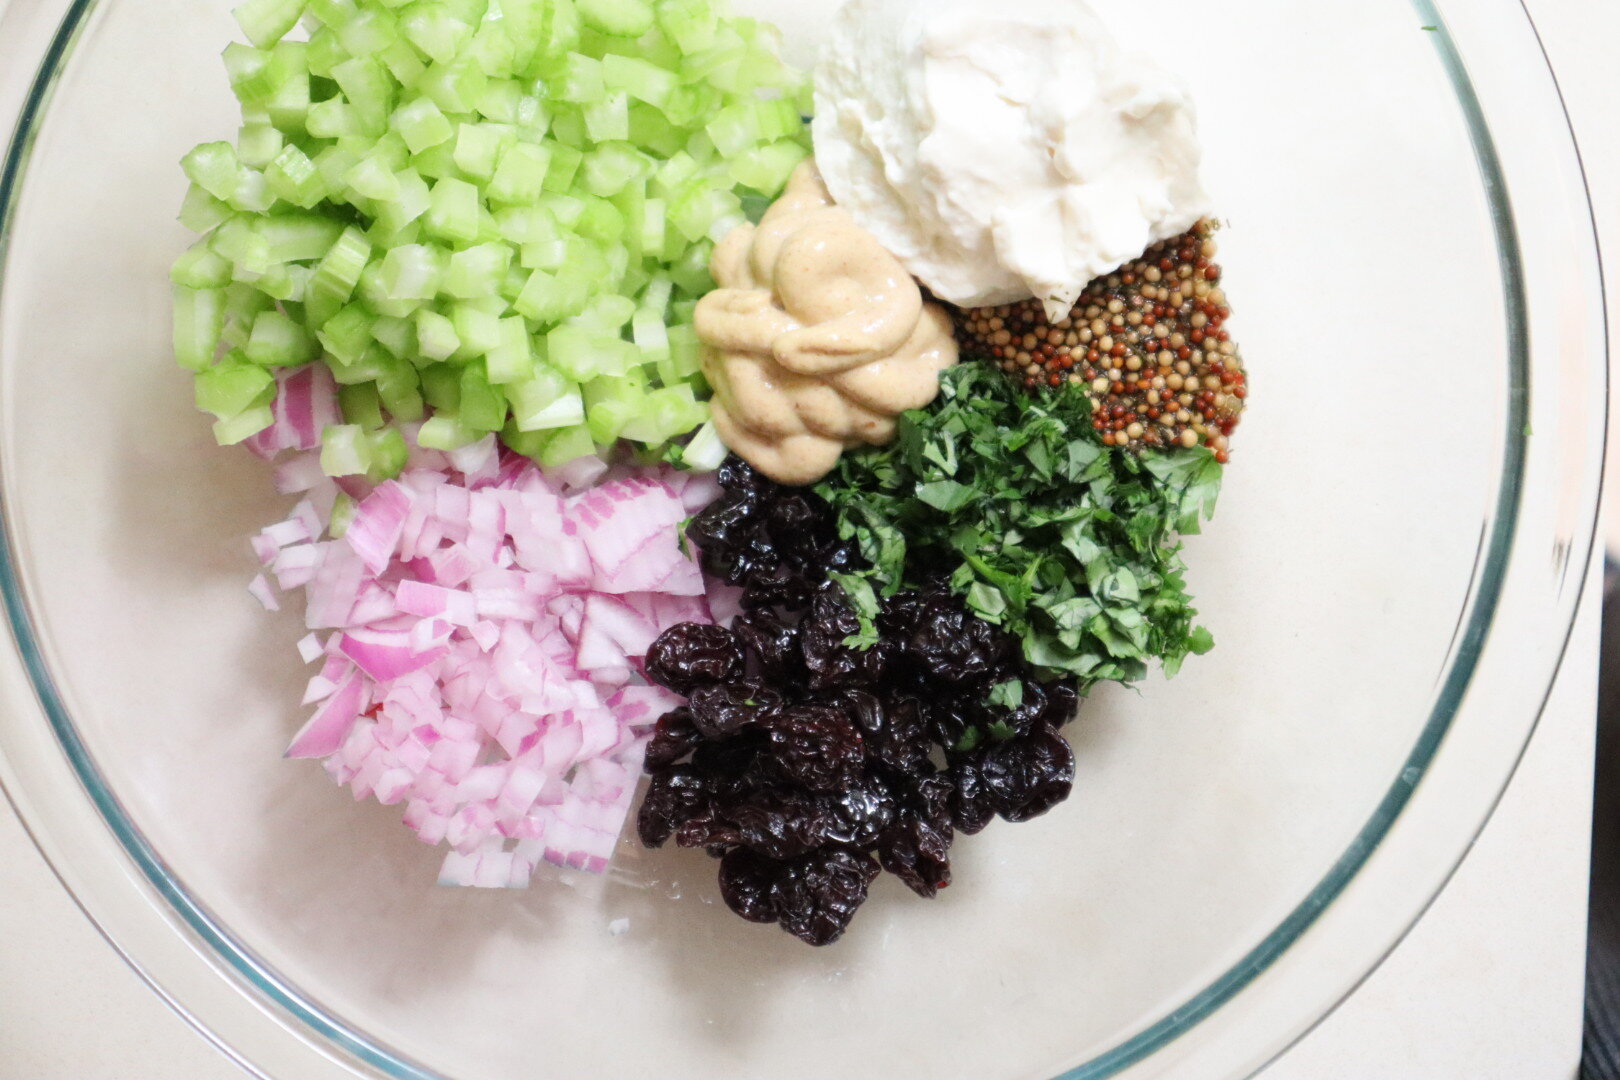
Alright, build your base with the basics PLUS a few extras that are key. In my opinion, you can’t have a chicken salad without the crisp celery, a red onion, some sort of mayonnaise and Dijon. Here’s how we spiced things up… add a dried fruit! I used dried cherries because of the texture, sweetness to tartness ratio, and the size. They are usually softer than dried cranberries which I enjoy. I also want to urge you to add an herb in this salad. I used cilantro because I had a bunch in my fridge and the flavors  worked really well but you could also  use tarragon or dill or even parsley.

Alright, build your base with the basics PLUS a few extras that are key. In my opinion, you can’t have a chicken salad without the crisp celery, a red onion, some sort of mayonnaise and Dijon. Here’s how we spiced things up… add a dried fruit! I used dried cherries because of the texture, sweetness to tartness ratio, and the size. They are usually softer than dried cranberries which I enjoy. I also want to urge you to add an herb in this salad. I used cilantro because I had a bunch in my fridge and the flavors worked really well but you could also use tarragon or dill or even parsley.

I used this avocado oil vegenaise because I actually prefer the consistency and flavor over regular but you can use whatever kind of mayonnaise you prefer!

I used this avocado oil vegenaise because I actually prefer the consistency and flavor over regular but you can use whatever kind of mayonnaise you prefer!

Cien Chiles “The Mustard” is a newer product that we carry at the shop and I can truly say I couldn’t be more excited. I love a good pickled mustard seed and this one is on-point. You get that pop of flavor, with the subtle heat, it makes your mouth happy. Plus it’s full of probiotics and sustainably sourced.

Cien Chiles “The Mustard” is a newer product that we carry at the shop and I can truly say I couldn’t be more excited. I love a good pickled mustard seed and this one is on-point. You get that pop of flavor, with the subtle heat, it makes your mouth happy. Plus it’s full of probiotics and sustainably sourced.

I always buy raw nuts and toast them if/when I need to. I used a raw walnut and toasted them in a dry pan for a few minutes until golden brown. I love walnuts with a chicken salad but you could also use an cashews (which would be great!) or almonds. Or a seed!

I always buy raw nuts and toast them if/when I need to. I used a raw walnut and toasted them in a dry pan for a few minutes until golden brown. I love walnuts with a chicken salad but you could also use an cashews (which would be great!) or almonds. Or a seed!

Everything about this salad is just perfection. Obviously you could use a canned chicken or tuna with this recipe but the marinated, grilled chicken is smoky and juicy and is just better. The crunch of the toasted walnuts, tartness of the dried cherries and the pop from the pickled mustard seeds. Yum. I marinated the Mary’s Organic Chicken thighs with a homemade romesco sauce which I had made a few days ago but you could also use a store bought one. I love sauces. Whenever I have the time I like to make something to have for the week. Romesco sauce is one of my favorites:- roasted red peppers - whole almonds - sun-dried tomatoes - raw garlic - smoked paprika - cayenne pepper - extra-virgin olive oilThis sauce is delicious on fish or chicken (even steak) or grilled vegetables. I also just love to have it on hand when I have a loaf of crusty sourdough. Once I marinated the chicken, I threw it on the grill and chopped it. I added it to the mixture of celery, nuts, cherries, mayo, mustard, herbs etc. when it was slightly warm because the flavors come together and it’s much better that way! Then I let cool fully and stuck it in the fridge to enjoy throughout the week!

Everything about this salad is just perfection. Obviously you could use a canned chicken or tuna with this recipe but the marinated, grilled chicken is smoky and juicy and is just better. The crunch of the toasted walnuts, tartness of the dried cherries and the pop from the pickled mustard seeds. Yum.

I marinated the Mary’s Organic Chicken thighs with a homemade romesco sauce which I had made a few days ago but you could also use a store bought one. I love sauces. Whenever I have the time I like to make something to have for the week. Romesco sauce is one of my favorites:

- roasted red peppers
- whole almonds
- sun-dried tomatoes
- raw garlic
- smoked paprika
- cayenne pepper
- extra-virgin olive oil

This sauce is delicious on fish or chicken (even steak) or grilled vegetables. I also just love to have it on hand when I have a loaf of crusty sourdough. Once I marinated the chicken, I threw it on the grill and chopped it. I added it to the mixture of celery, nuts, cherries, mayo, mustard, herbs etc. when it was slightly warm because the flavors come together and it’s much better that way! Then I let cool fully and stuck it in the fridge to enjoy throughout the week!

I served this over little gem lettuce for dinner but you could easily place a hefty scoop between two pieces of bread and call it good!INGREDIENTS- 1 package of Mary’s Organic Chicken Thighs - 1 cup toasted walnuts - 1/2 cup dried cherries - 2 tbsp dijon mustard - 1/4 cup mayo - 3 tbsps pickled mustard seeds - 3 stalks celery - 1/4 cups red onion  - 1/4 cup cilantro

I served this over little gem lettuce for dinner but you could easily place a hefty scoop between two pieces of bread and call it good!

INGREDIENTS

- 1 package of Mary’s Organic Chicken Thighs
- 1 cup toasted walnuts
- 1/2 cup dried cherries
- 2 tbsp dijon mustard
- 1/4 cup mayo
- 3 tbsps pickled mustard seeds
- 3 stalks celery
- 1/4 cups red onion
- 1/4 cup cilantro

Print Friendly and PDFPrint Friendly

Carne Asada Tacos with Cilantro Kale Slaw and Pickled Cauliflower

It feels like summer around here and all I want to do is cook outside, and fire up the grill! I couldn’t be more excited that we’re carrying a few products from Pacific Pickle Works here in Santa Barbara. My favorite is the pickled cauliflower which I could eat with almost anything… It’s delicious paired with these carne asada tacos, trust me on this one. I’m a huge fan of Mexican food because of the fresh, bold, bright flavors. This juicy carne asada recipe is delicious, just add some chips and fresh Carpinteria guacamole and you’ve got yourself a party.

IMG_0952.JPG
IMG_0953.jpg
This Pacific Pickle Works cauliflower is my favorite! This concoction blends punchy California chiles and umami-rich aromatics with a classic vinegar pucker. It’s crunchy and flavorful, and pairs perfectly with these carne asada tacos.

This Pacific Pickle Works cauliflower is my favorite! This concoction blends punchy California chiles and umami-rich aromatics with a classic vinegar pucker. It’s crunchy and flavorful, and pairs perfectly with these carne asada tacos.

It’s all about the marinade! Here’s the deal… Orange juice, lime juice, olive oil, fresh garlic, dried oregano, chili powder, salt, cumin, pepper,  & cayenne. Because there’s so much citrus, 1-4 hours is ideal.

It’s all about the marinade! Here’s the deal… Orange juice, lime juice, olive oil, fresh garlic, dried oregano, chili powder, salt, cumin, pepper, & cayenne. Because there’s so much citrus, 1-4 hours is ideal.

Love whipping up a slaw with whatever we have in the fridge. I usually always have kale so for this one I used shaved kale, shaved Brussels sprouts (you could also just do cabbage), and pickled red onion - which I quickly pickled in red wine vinegar and organic sugar. I usually would use a lime plus olive oil to massage the greens but I used a pixie tangerine because they’re in season (a very short season that is!) and it turned out well!

Love whipping up a slaw with whatever we have in the fridge. I usually always have kale so for this one I used shaved kale, shaved Brussels sprouts (you could also just do cabbage), and pickled red onion - which I quickly pickled in red wine vinegar and organic sugar. I usually would use a lime plus olive oil to massage the greens but I used a pixie tangerine because they’re in season (a very short season that is!) and it turned out well!

1. Marinate your meat. One hour is enough, but it can sit for up to four hours. Don’t go over four hours because there’s so much citrus in the marinade, the meat will begin to break down too much if you let it sit too long.

2. Season it! Once it’s marinated, sprinkle with salt and pepper.

3. Grill it. Usually about five-eight minutes per side, but keep an eye on it.

4. Don’t forget to let it rest! You want to ensure the juiciness.. letting a steak rest is the way to go.

5. Slice the grilled steak thinly against the grain and serve! We love it on a taco but you could also serve it on its own with an avocado, radish, little gem salad.

INGREDIENTS

- 2 lbs flank or skirt steak
- 1 orange juiced (1/4 cup)
- 2 limes juiced (1/2 cup)
- 2 tbsp olive oil
- 8 garlic gloves, minced
- 2 tsp oregano
- 2 tsp chilli powder
- 2 tsp salt
- 2 tsp cumin
- 1 tsp freshly ground pepper
- 1/4 tsp cayenne pepper

Print Friendly and PDFPrint Friendly

Farro Salad with Spring Vegetables & Pecorino

Our go-to grain bowl for Spring! Like most recipes we showcase here, this recipe is adaptable to whatever you may have in your fridge, find at the farmers market or pick up from our produce section at the shop! To me, this recipe celebrates Spring - the better your veggies are, the better the salad will be.

There’s something about farro I love… it’s chewy, nutty and cooks quickly. This salad is great on it’s own or could be served as a side with local fish, roast chicken or even with a soft boiled egg for breakfast. Farro is packed full of fiber, prote…

There’s something about farro I love… it’s chewy, nutty and cooks quickly. This salad is great on it’s own or could be served as a side with local fish, roast chicken or even with a soft boiled egg for breakfast. Farro is packed full of fiber, protein and vitamins like magnesium, zinc and even vitamin B. Zinc is essential for a healthy immune system and healing, so being freshly postpartum myself, I’m incorporating this grain into my diet often which keeps me filling full and satisfied!

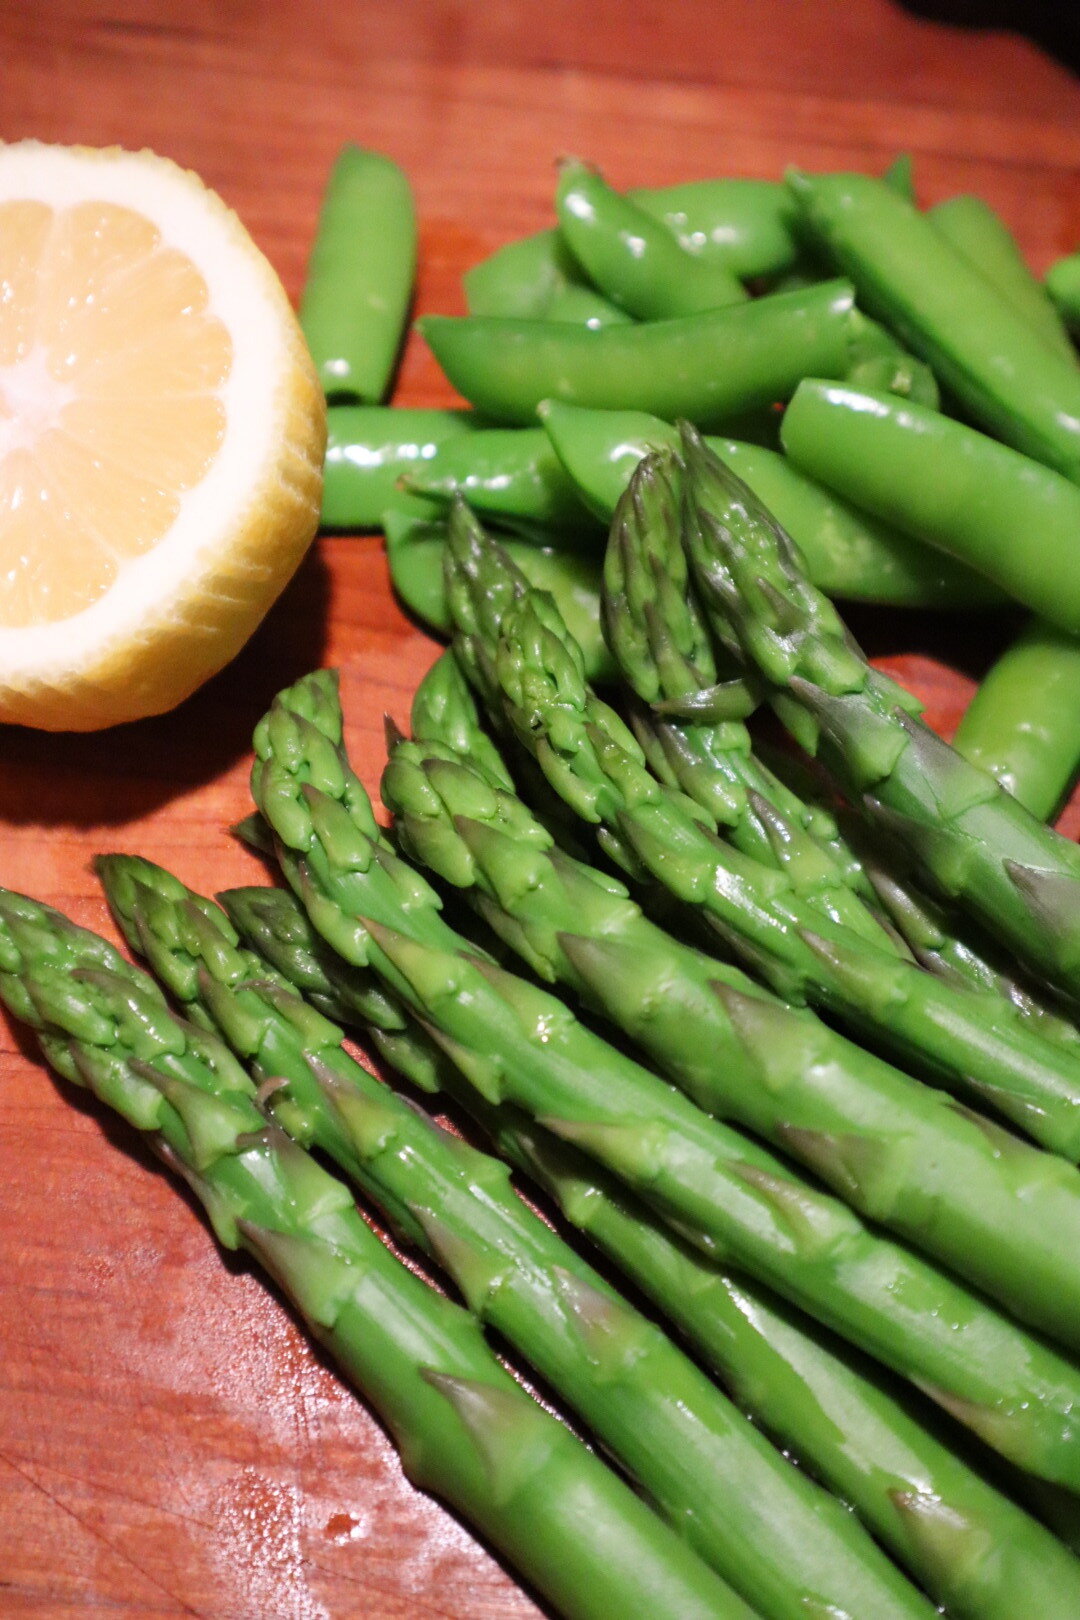
You can use whatever veggies you like! If you prefer raw veggies, feel free. I like to quickly blanch mine for easier digestion. You still want to have that fresh crunch, so I just quickly blanch in boiling water for a minute or two. I used asparagu…

You can use whatever veggies you like! If you prefer raw veggies, feel free. I like to quickly blanch mine for easier digestion. You still want to have that fresh crunch, so I just quickly blanch in boiling water for a minute or two. I used asparagus, sugar snap peas, wild arugula and shiitake mushrooms here.

I love a good salad that can hold up in the fridge. This salad gets better the next day as the blanched veggies marinade in the lemon.

I love a good salad that can hold up in the fridge. This salad gets better the next day as the blanched veggies marinade in the lemon.

What’s better than a seared, flavorful, umami mushroom?! These are shiitakes but feel free to use whatever mushroom you love. We have some gorgeous mushrooms available at our farmers markets right now. I use high heat to heat some oil and butter for…

What’s better than a seared, flavorful, umami mushroom?! These are shiitakes but feel free to use whatever mushroom you love. We have some gorgeous mushrooms available at our farmers markets right now. I use high heat to heat some oil and butter for a good sear. DON’T MOVE THEM AROUND! This is key. Let them get crispy for about a minute, then coat toss until fully coated in the fat. Continue to sear for another few minutes then turn down the heat and cook on low for a few minutes. I add a splash of red wine and/or a dash of vinegar. Let that cook down and almost caramelize. Season with salt and pepper and add to your salad! The warm mushrooms make it feel like more of a meal, and add great texture and flavor.

Spring is in full swing here in Carpinteria and we couldn’t be happier! This is an easy weeknight meal or lunch that celebrates the best parts of spring! INGREDIENTSFor the Farro:1 cup sugar snap peas 1 bunch asparagus 2 cups shiitake mushrooms 1/2 …

Spring is in full swing here in Carpinteria and we couldn’t be happier! This is an easy weeknight meal or lunch that celebrates the best parts of spring!

INGREDIENTS

For the Farro:

1 cup sugar snap peas
1 bunch asparagus
2 cups shiitake mushrooms
1/2 cup shaved pecorino
1 handfuls arugula and/or pea tendrils
1/4 cup toasted pistachios
add whatever fresh herbs you like!

For the dressing:

1 lemon juiced
2 teaspoons champagne vinegar
1 tablespoon dijon mustard
1/3 cup olive oil
1/2 teaspoon of chili flakes
2 gloves crushed garlic
salt and pepper to taste

Print Friendly and PDFPrint Friendly

Tropical Matcha Mango Smoothie

Whether you’re new to making smoothies or it’s your daily ritual, this recipe is perfect for spring. It’s refreshing and packs some caffeine so it’s a great way to start the day. The mango makes the smoothie sweet and creamy and the matcha makes it healthy and green!

What I love about smoothies is that you can use whatever you have in your fridge and swap out the fruit, nut milks, veggies, protein powders/superfood boosts and nut butters! I love using frozen mango because it acts as a thickener on its own, so yo…

What I love about smoothies is that you can use whatever you have in your fridge and swap out the fruit, nut milks, veggies, protein powders/superfood boosts and nut butters! I love using frozen mango because it acts as a thickener on its own, so you don’t necessarily need the banana, yogurt or nuts in this recipe for a thick, creamy smoothie. The mango is sweet and refreshing and is packed full of vitamin C.

I love a good iced matcha latte in the spring especially. It’s nutty and full of antioxidants with some caffeine that doesn’t give me the “rush” that coffee does… it’s more of a sustained energy for a longer period of time. Matcha is made from grind…

I love a good iced matcha latte in the spring especially. It’s nutty and full of antioxidants with some caffeine that doesn’t give me the “rush” that coffee does… it’s more of a sustained energy for a longer period of time. Matcha is made from grinding the whole green tea leaf and remember, a little goes a long way!

Why not add some greens in to your morning routine?! The sweetness from the mango masks the taste of the spinach so I add in two hefty handfuls. There are so many benefits to spinach. Being one week postpartum, I’m trying to incorporate as much iron…

Why not add some greens in to your morning routine?! The sweetness from the mango masks the taste of the spinach so I add in two hefty handfuls. There are so many benefits to spinach. Being one week postpartum, I’m trying to incorporate as much iron as possible into my diet as my body heals. Spinach is a fantastic source of iron along with many vitamins and minerals like vitamins A, C, K1, calcium and folic acid. It’s an extremely nutrient-rich vegetable that can boost eye health, help regulate blood pressure, and can aid in blood clotting. We love adding spinach to smoothies, gently sautéing with other vegetables for easy dinners and incorporating into fresh salads.

This smoothie was quick to whip up and gives you the nutrients to feel sustained for a few hours in the morning or indulge in an afternoon pick-me-up snack!INGREDIENTS- 2 cups frozen mango - 2 teaspoons matcha - 2 cups almond milk (or nut milk of yo…

This smoothie was quick to whip up and gives you the nutrients to feel sustained for a few hours in the morning or indulge in an afternoon pick-me-up snack!

INGREDIENTS

- 2 cups frozen mango
- 2 teaspoons matcha
- 2 cups almond milk (or nut milk of your choice)
- 1 handful of ice
- 2 scoops collagen
- 2 heaping handfuls of fresh spinach
- 1 teaspoon chia seeds

Blend all ingredients together and feel free to add a frozen banana or half an avocado to make it even creamier!

Recipe by Alyssa Potter

Print Friendly and PDFPrint Friendly

Healing Coconut Chia Seed Pudding

IMG_0344.jpg

Health Benefits of Chia

Rich in fiber, calcium, magnesium, phosphorous and antioxidants

Excellent source of essential fatty acids

May provide therapeutic benefits for certain immune, digestive and cardiovascular conditions

Ingredients

1 1/2 cups full fat coconut milk

1/2 cup chia seeds

1-2 tbsp maple syrup

1 tsp vanilla extract

For serving I love to make my own fresh fruit compote

with whatever fruit is in season!

Instructions

  1. Mix together your milk, chia seeds, maple syrup and vanilla - whisk to combine

  2. Cover and refrigerate overnight (or at least 6 hours). The pudding should be thick and creamy. If not, add more chia seeds, stir, and refrigerate for another hour or so.

  3. Enjoy on its own or add a layer of fresh fruit (or homemade compote!) It will last in the fridge for up to 5 days.

Print Friendly and PDFPrint Friendly

Nourishing Bone Broth

Benefits of Bone Broth

This rich broth is high in vitamins, minerals, and amino acids which are the building blocks of protein. It will contain high amounts of collagen, which help support bone and joint health. It’s easy to digest, so these nutrients are easy for the body to absorb, which makes them more available to the body - especially for those with digestive issues.

I like to add another squeeze of citrus, some fresh ground pepper and sliced scallions and sip it. You can also use it to cook rice or make it into a soup with fresh veggies. It’s warming, nourishing and comforting plus it’s packed with vitamins!

How-to-Make-Chicken-Bone-Broth-1-pot-3-ingredients-step-by-step-methods-chicken-bonebroth-glutenfree-recipe-minimalistbaker-20.jpg
  1. Simply save the bones from your roasted chicken and add to a dutch oven! I love to include a whole lemon cut in half and any fresh herbs I might have… like rosemary or thyme.

  2. Just fill with filtered water until generously covered.

  3. Add a pinch or two of salt and 1-2 tablespoons of apple cider vinegar. You can also squeeze the juice from the lemon in instead, but I prefer the vinegar because the acidity breaks down the collagen and makes it more abundant in the broth.

  4. Bring to a boil, then reduce to a simmer and cook for at least 8 hours. You’ll want to to be reduced by 1/2 or 1/2. The more it reduces, the more intense the flavor becomes and the more collagen is extracted. You can cook for a bit longer if you have the time or use a pressure cooker!

  5. Strain and use or store in the fridge.

Print Friendly and PDFPrint Friendly

Kale Walnut Pesto

This is a recipe for a vivid, vegetarian pasta sauce, made from blanched kale leaves and loaded with good olive oil, grated parmesan, toasted walnuts and roasted garlic. It’s simple and quick from start to finish and the result is a luxurious, silky sauce. I served mine over an organic pasta, maybe because I’m 9 months pregnant and have been living off CARBS but it was delicious none-the-less. You could also toss some roasted veggies in it or serve it with chicken or even fish.

First, de-stem the kale. The stems are bitter so it’s best to discard.

First, de-stem the kale. The stems are bitter so it’s best to discard.

Then, toast the nuts of your choice - I chose walnuts here! You also want to sauté the garlic in a generous amount of olive oil.

Then, toast the nuts of your choice - I chose walnuts here! You also want to sauté the garlic in a generous amount of olive oil.

Blanch those kale leaves in boiling water for 4-5 minutes or just until tender. Don’t over do it!

Blanch those kale leaves in boiling water for 4-5 minutes or just until tender. Don’t over do it!

Throw it all in the blender.. the blanched kale, roasted garlic, fresh basil leaves, shredded parmesan and the toasted nuts. I added about 1/2 a cup of the water I blanched the kale in to get the blender going. Then drizzle in the olive oil to creat…

Throw it all in the blender.. the blanched kale, roasted garlic, fresh basil leaves, shredded parmesan and the toasted nuts. I added about 1/2 a cup of the water I blanched the kale in to get the blender going. Then drizzle in the olive oil to create the right consistency. Squeeze 1/4 of a lemon into the mix for some acidity to balance.

I personally love a good pesto with plenty of salty cheese but you could also easily make this sauce vegan by substituting nutritional yeast for the cheese to give it that nutty flavor.

I personally love a good pesto with plenty of salty cheese but you could also easily make this sauce vegan by substituting nutritional yeast for the cheese to give it that nutty flavor.

Be sure to let the blender run on a powerful setting, you want the kale to completely break down into a smooth, bright, airy green puree.

Be sure to let the blender run on a powerful setting, you want the kale to completely break down into a smooth, bright, airy green puree.

I made the noodles, strained them but reserved 1 cup of the pasta water for the sauce. I quickly put the hot pasta back into the cast iron skillet and tossed with olive oil and incorporated an egg yolk in and stirred. I wanted it to be borderline ca…

I made the noodles, strained them but reserved 1 cup of the pasta water for the sauce. I quickly put the hot pasta back into the cast iron skillet and tossed with olive oil and incorporated an egg yolk in and stirred. I wanted it to be borderline carbonara style… my favorite… then I added the kale pesto with a splash of the pasta water and incorporated it together until smooth. Garnish with freshly grated Parmesan, pepper and chili flakes! Serve warm!

INGREDIENTS

- 1 bunch of kale
- 4 cloves of garlic (smashed)
- 1-2 cups fresh basil
- 1 cup walnuts
- 1/2 cup olive oil plus more for serving
- 3/4 cups grated parmesan
- 2 tablespoons fresh lemon juice
- pasta of your choice!

Print Friendly and PDFPrint Friendly

Cleansing Celery + Lemon Juice

We know celery juice was and has been a “trend” but we’re still all about it at our house! Drinking this Celery Lemon tonic first thing in the morning will help heal your gut, boost your liver and support your body! We believe that celery juice is one of the most powerful and healing juices we can drink.

What’s so great about celery and what are the benefits?! Well, celery contains two super beneficial antioxidants apigenin and luteolin. Research shows that they both reduce inflammation and may help treat a range of inflammatory diseases. 1. Celery …

What’s so great about celery and what are the benefits?! Well, celery contains two super beneficial antioxidants apigenin and luteolin. Research shows that they both reduce inflammation and may help treat a range of inflammatory diseases.

1. Celery Juice heals and activates the gut
By restoring hydrochloric acid, it helps us digest things faster and more efficiently. Celery juice helps raise stomach acid, which is necessary to break down food… especially protein. Many of you are on a high protein diet lately so this can be beneficial to you to incorporate! Celery juice has the ability to replenish depleted levels of gastric mucus that is needed in the stomach lining to heal and prevent ulcers and acid reflux.

2. Celery Juice is a natural anti-inflammatory
It contains polyacetylene which reduces chronic join pain, gout, and rheumatoid arthritis. Not only does it sooth the body, but it’s also known to sooth the nerves, with calming and relaxing properties.

3. Celery Juice aids the liver
Studies show that celery helps reduce fat build up in the liver. The nutrients in celery protect the liver, and actually help the liver produce enzymes that help flush fat and toxins out. What?!

4. Celery Juice is alkalizing
Celery is one of the most alkaline foods you can eat! An alkaline diet prevents chronic disease.

5. Celery Juice is highly nutritious
Celery is loaded with essential minerals and vitamins like folate, potassium, vitamin B6, vitamin K and vitamin C. A delicious cocktail for the skin is what that combo is! The luteolin in celery protects skin from the inside and prevents UV-induced damage. Some people swear by celery’s skin healing properties, saying that it has helped clear up skin conditions like psoriasis and acne.

Personally, after drinking celery juice consistently I feel like my stomach digests things more efficiently and quicker, I feel less bloated and my skin feels more hydrated. I have less salt and sugar cravings (which is saying a lot for me) and I just simply feel nourished. I get an almost instant energy boost and my joints feel less stiff. It may not seem like the tastiest juice, but try it and see how you feel! Listen to your body!

This juice is extremely simple to make. I used one bunch of celery and one Meyer lemon. Simply put through your juicer and strain! Make sure to drink right away, or refrigerate for up to two days to be safe - and make sure your container seals completely.

Cheers!

Print Friendly and PDFPrint Friendly

Organic Meyer Lemon Curd

I’m clearly on a lemon kick over here! If you’ve ever bought lemon curd from the store, it doesn’t compare to this scratch-made lemon curd that is tangy, sweet and creamy. You only need 5 ingredients and it comes together in 10 minutes. I wanted to make something quickly to put on top of my whole wheat berry/lemon scones and this has been a delicious treat.

What is lemon curd? It’s a rich dessert topping or spread that is buttery and sweet with a super intensely tart lemon flavor. My grandma loves everything lemon, this always reminds me of her! You can keep it in the fridge and top your scones or muff…

What is lemon curd? It’s a rich dessert topping or spread that is buttery and sweet with a super intensely tart lemon flavor. My grandma loves everything lemon, this always reminds me of her! You can keep it in the fridge and top your scones or muffins with it, even swirl a tad in your greek yogurt in the morning or use as a filling for a cake.

You really only need 5 ingredients! - Organic Egg Yolks - Fresh Lemons - Organic Turbinado Sugar - Salt - Organic Butter * I added a dash of bourbon vanilla for a little extra depth but you can skip

You really only need 5 ingredients!

- Organic Egg Yolks
- Fresh Lemons
- Organic Turbinado Sugar
- Salt
- Organic Butter
* I added a dash of bourbon vanilla for a little extra depth but you can skip

How to make the Lemon Curd:Make sure you’re using all of these ingredients listed above - each serves a critical purpose for not only the flavor but the thickening as well. The egg yolks thicken the curd (just like they do in a pudding or creme brûl…

How to make the Lemon Curd:

Make sure you’re using all of these ingredients listed above - each serves a critical purpose for not only the flavor but the thickening as well. The egg yolks thicken the curd (just like they do in a pudding or creme brûlée). Make sure you’re using real lemons because you’ll need the zest as well for that extra punch. The sugar and salt create balance and the butter makes it super creamy which you definitely don’t want to miss out on.

You’ll need to use a double boiler. If you don’t have one, don’t worry… you can easily make one! Make it by placing a heatproof glass bowl on top of a larger pot. Make sure the bottom of the top bowl does not touch the simmering water beneath. Don’t try to cook over direct heat, it will burn!

One more tip, if you don’t want it to have that metallic aftertaste make sure you stir it with a silicone whisk or even a wooden spoon.

INGREDIENTS- 4 large egg yolks - 2/3 cups sugar - 1 tablespoon lemon zest (about 1 lemon) - 1/3 cup fresh lemon juice - 1/8 teaspoon salt - 6 tablespoons unsalted grass-fed butter (softened to room temperature)INSTRUCTIONS1. Fill the bottom of your …

INGREDIENTS

- 4 large egg yolks
- 2/3 cups sugar
- 1 tablespoon lemon zest (about 1 lemon)
- 1/3 cup fresh lemon juice
- 1/8 teaspoon salt
- 6 tablespoons unsalted grass-fed butter (softened to room temperature)

INSTRUCTIONS

1. Fill the bottom of your pot (double boiler), with 1/2 inches of water. Place on high heat and let it come to a boil. Then reduce to low heat and keep it at a simmer.

2. Place the egg yolks, sugar, lemon zest, lemon juice, and salt into the top pot of your double boiler. Using a silicone whisk or wooden spoon, whisk until it’s completely blended then continue to whisk or stir as the curd cooks. Make sure you keep it moving so the yolks don’t curdle. You want to keep whisking until the mixture becomes thick, at least 10 minutes. If it’s not thickening, turn up the heat and continue to whisk.

3. Remove pan from the heat and stir in the butter, it will melt from the heat of the curd. Pour the mixture into a glass jar and put a piece of plastic wrap directly on top of the curd so it’s touching. This prevents a skin from forming on the top. The curd will continue to thicken as it cools. Once it’s cooled, the plastic wrap can be taken off.

4. Refrigerate for up to about 10 - 12 days. Enjoy!

Print Friendly and PDFPrint Friendly

Berry Meyer Lemon Whole Wheat Scones

I have to admit, I’ve had quite the craving for sweet baked goods in the morning. I love a good blueberry muffin and wanted to create something that would satisfy my cravings with less guilt! Caroline of chocolate and carrots inspired me with her Lemon Blueberry Scones. This recipe is amazing because it doesn’t have many ingredients, comes together quickly, and uses whole wheat flour and greek yogurt (instead of all of the butter). The texture is pretty perfect… they have a slight crunch on the outside, and a chewy, moist, fluffy texture with bursts of flavor. They aren’t too sweet and are a prime way to start your day.

IMG_0162.jpg
I used Meyer lemons from my tree out front which was a treat! We’ve been patiently waiting for them to ripen for months, they are my personal favorite type of lemon (a cross between a mandarin and a lemon). They’re a little sweeter and have an almos…

I used Meyer lemons from my tree out front which was a treat! We’ve been patiently waiting for them to ripen for months, they are my personal favorite type of lemon (a cross between a mandarin and a lemon). They’re a little sweeter and have an almost floral taste. It’s fragrant and bright and is delicious in this recipe.

This is the yogurt I chose to use in this recipe and I’m so glad I did! We carry it at the shop and I love it because of both the taste and consistency. It’s not easy to find a good quality yogurt! There’s no chemicals, preservatives, antibiotics or…

This is the yogurt I chose to use in this recipe and I’m so glad I did! We carry it at the shop and I love it because of both the taste and consistency. It’s not easy to find a good quality yogurt! There’s no chemicals, preservatives, antibiotics or thickeners used so you can feel totally confident in feeding this to your entire family.

You could easily just do a blueberry lemon scone which would be delicious, but I have a thing for raspberries - especially in scones. Maybe it’s the texture or pop of tartness or a combination of the two but I added some in for fun.

You could easily just do a blueberry lemon scone which would be delicious, but I have a thing for raspberries - especially in scones. Maybe it’s the texture or pop of tartness or a combination of the two but I added some in for fun.

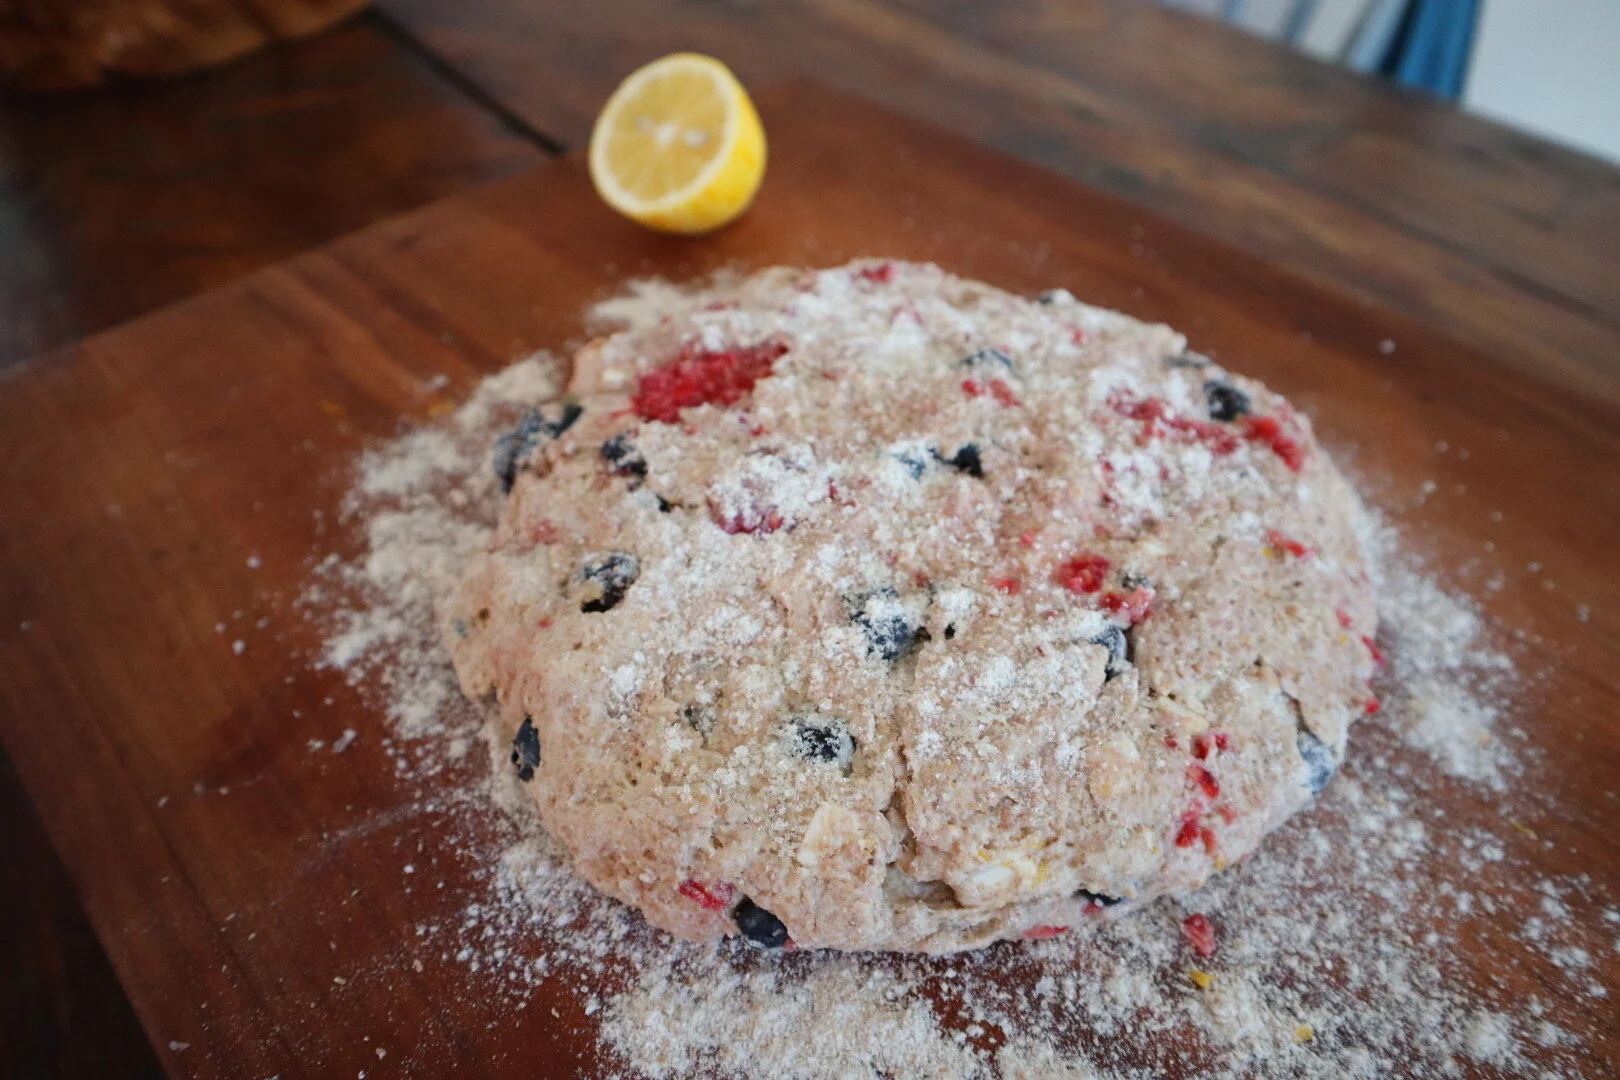
My mixture came out to be a tad wet so I added a touch of additional flour to the cutting board before I shaped and sliced the dough. In the past, I’ve been intimated to make scones but these really come together quickly and easily! I threw a few in…

My mixture came out to be a tad wet so I added a touch of additional flour to the cutting board before I shaped and sliced the dough. In the past, I’ve been intimated to make scones but these really come together quickly and easily! I threw a few in the oven to eat right away and froze the rest, to satisfy my next craving in a pinch!

My two year old absolutely loves being in the kitchen with us… “Mom, I help too?” This was a fun activity to let her “help” with. She helped mix the dry ingredients and added the berries herself. I mean, a Saturday morning is for staying in your jam…

My two year old absolutely loves being in the kitchen with us… “Mom, I help too?” This was a fun activity to let her “help” with. She helped mix the dry ingredients and added the berries herself. I mean, a Saturday morning is for staying in your jammies and baking with mom right?! That bedhead though…

They only take 15 minutes to bake, make them for breakfast this weekend and freeze the rest for later!INGREDIENTS2 cups whole wheat flour 1 tablespoon baking powder 3 tablespoons turbinado (raw cane) sugar, plus more for sprinkling on top 1/8 teaspo…

They only take 15 minutes to bake, make them for breakfast this weekend and freeze the rest for later!

INGREDIENTS

2 cups whole wheat flour
1 tablespoon baking powder
3 tablespoons turbinado (raw cane) sugar, plus more for sprinkling on top
1/8 teaspoon salt
1 teaspoon vanilla extract
5 tablespoons grass-fed organic butter, cubed
zest of 1 lemon
1 cup blueberries
1/2 cup raspberries
1/2 cup yogurt
1/2 cup milk of choice (I used whole milk)

INSTRUCTIONS

1. Preheat oven to 425 degrees

2. Combine flour, baking powder, sugar, and salt in a bowl and mix

3. Slice butter and drop it into dry ingredients (cut butter into small cubes)

4. Add berries and lemon zest and gently stir

5. Gently mix in milk and yogurt and kneed with your hands gently

6. Form dough into a circle that’s about an inch deep all around and slice into 6-8 pieces

7. Separate slices and place on a baking sheet covered in parchment paper

8. Sprinkle the tops of the scones with raw sugar

9. Bake for 15 minutes or until light brown

10. Serve with fresh lemon curd, more butter, or homemade jam!

Print Friendly and PDFPrint Friendly

Winter Citrus Salad

Sharing another salad that you can whip up in a few minutes and holds well so you can prep it before having guests over! I love this salad served with anything hearty like a beef tenderloin or delicious winter pasta. But it can also be served alongside a cheeseboard for a great lunch!

Here’s the finished salad! I love this combination because the radicchio, kale and brussels are crunchy and slightly bitter but the citrus, fresh mint, toasted nuts and the burst of flavor that the pomegranate add just work really well together! I l…

Here’s the finished salad! I love this combination because the radicchio, kale and brussels are crunchy and slightly bitter but the citrus, fresh mint, toasted nuts and the burst of flavor that the pomegranate add just work really well together! I love playing around with different flavor combinations, next time I’d do more citrus and possibly a few more toasted walnuts but it is a salad that leaves you wanting more. We all ate heaping plate fulls!

Winter citrus is prime especially here in Southern California. My sister lives on a ranch with avocado trees and oranges so we take full advantage of the citrus this time of year. I added in a grapefruit for the acidity and I love the sweet tangines…

Winter citrus is prime especially here in Southern California. My sister lives on a ranch with avocado trees and oranges so we take full advantage of the citrus this time of year. I added in a grapefruit for the acidity and I love the sweet tanginess it adds.

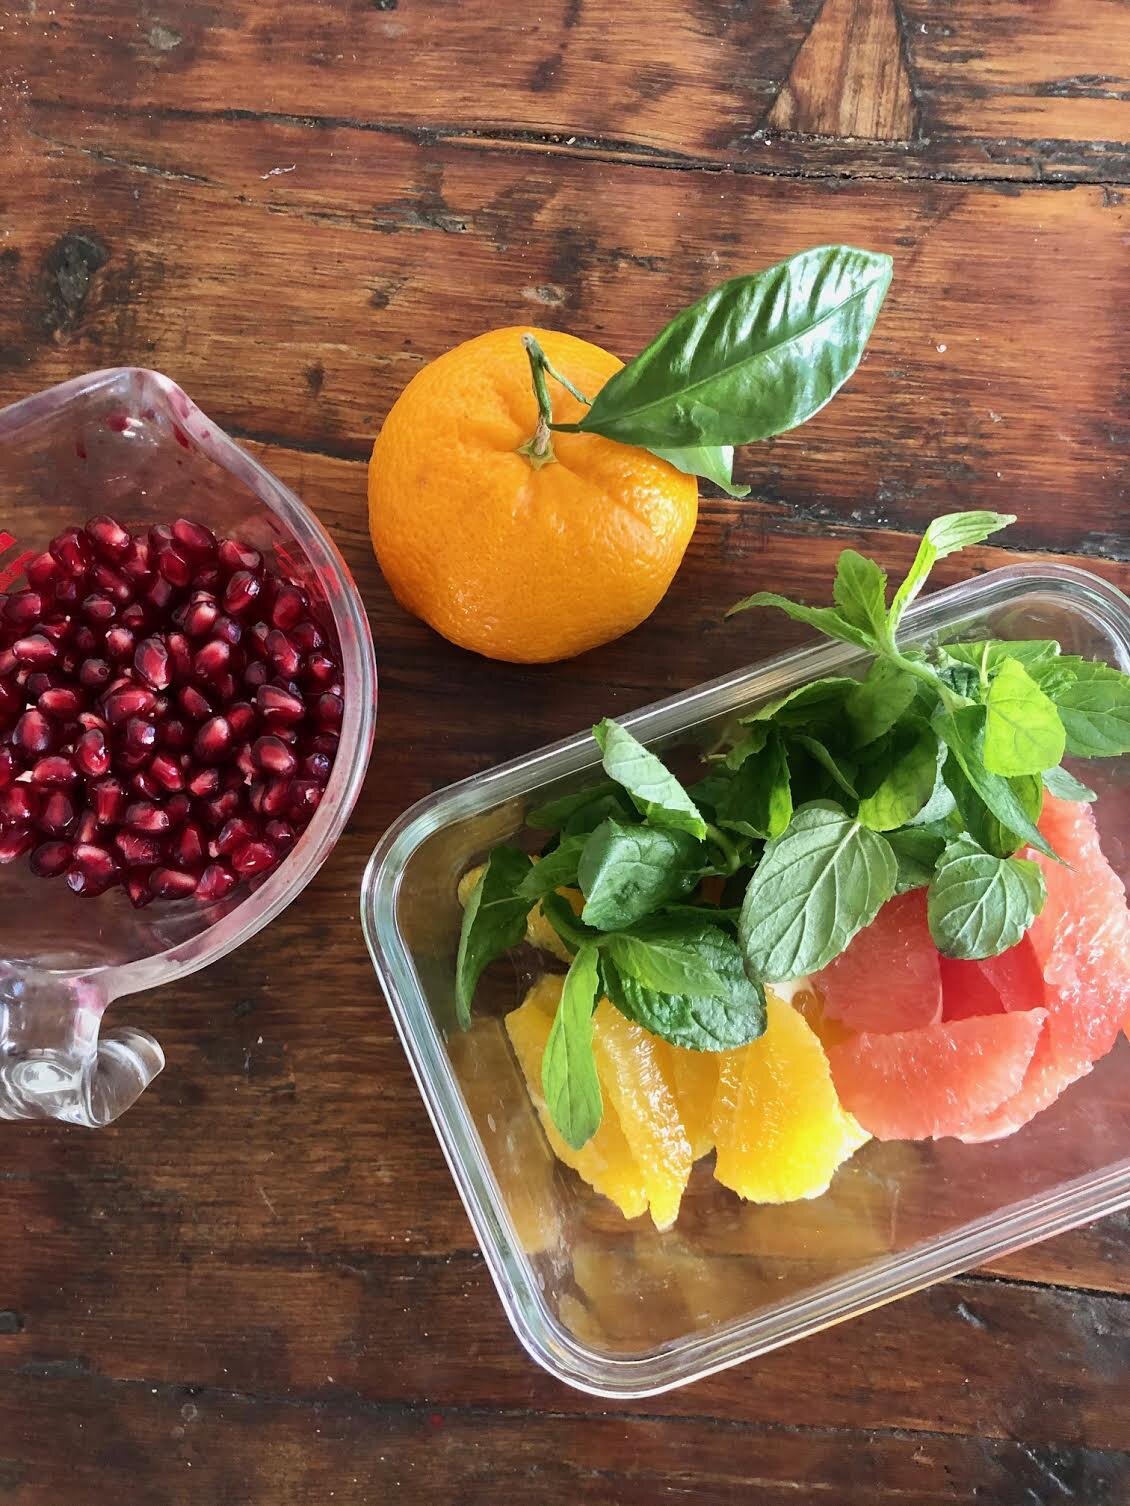
I love to segment citrus for salads because the chewy membrane is gone and all you have left is the juicy, sweet orange. It’s almost the texture of sashimi.. I know that sounds odd but it melts in your mouth and is so great in a salad. If you haven’t done it, it’s easy! You just need a sharp knife. First cut the peel off of the citrus (start by slicing off the bottom you have a flat surface). Remove all of the white pith so it’s just the orange showing, no white. Hold the orange gently in your hand and with a sharp knife, carefully cut between a segment and the membrane. Don’t cut all the way through - just to the center. Give it a little twist and peel the segment away from the other connective membrane.

I don’t know about you, but I always need a toasted nut or seed on my salads. I like the crunch and by toasting the nuts the flavor really comes to life! I like to slowly toast walnuts, pecans, pistachios or almonds on the stove but you can also tos…

I don’t know about you, but I always need a toasted nut or seed on my salads. I like the crunch and by toasting the nuts the flavor really comes to life! I like to slowly toast walnuts, pecans, pistachios or almonds on the stove but you can also toss them in the oven. I dry roast them, and don’t use any oil.

It’s all about the simple dressings for me lately. This salad is so packed full of flavor all I used was olive oil, lemon juice and salt and pepper. If you wanted to elevate it a bit you could add some dijon to the mix and/or a white wine vinegar and a tiny bit of honey.

INGREDIENTS:1/2 - 1 bulb of raddichio (depending on the size) 1 bunch shaved kale 2 cups shaved brussels sprouts 2 oranges (segmented) 1 grapefruit 1 bunch fresh mint 1 cup walnuts, toasted 1 pomegranate Juice from 1 lemon 1/3 cup olive oil 1/4 cup …

INGREDIENTS:

1/2 - 1 bulb of raddichio (depending on the size)
1 bunch shaved kale
2 cups shaved brussels sprouts
2 oranges (segmented)
1 grapefruit
1 bunch fresh mint
1 cup walnuts, toasted
1 pomegranate
Juice from 1 lemon
1/3 cup olive oil
1/4 cup shaved salty hard cheese (like goat gouda or parmesan)
salt and pepper to taste

You can prep the greens and raddichio ahead of time, they’ll hold up in the fridge! An hour or two before serving, massage the greens with olive oil and lemon juice.

Then segment the citrus, toast the nuts, tear the mint, remove the pomegranate arils and toss together! It’s that simple! Toss the shaved cheese on top of each salad before serving. I can’t wait to see what you create in your own kitchen! If you make any unique additions, let us know!

Print Friendly and PDFPrint Friendly

Holiday Cheese Platter

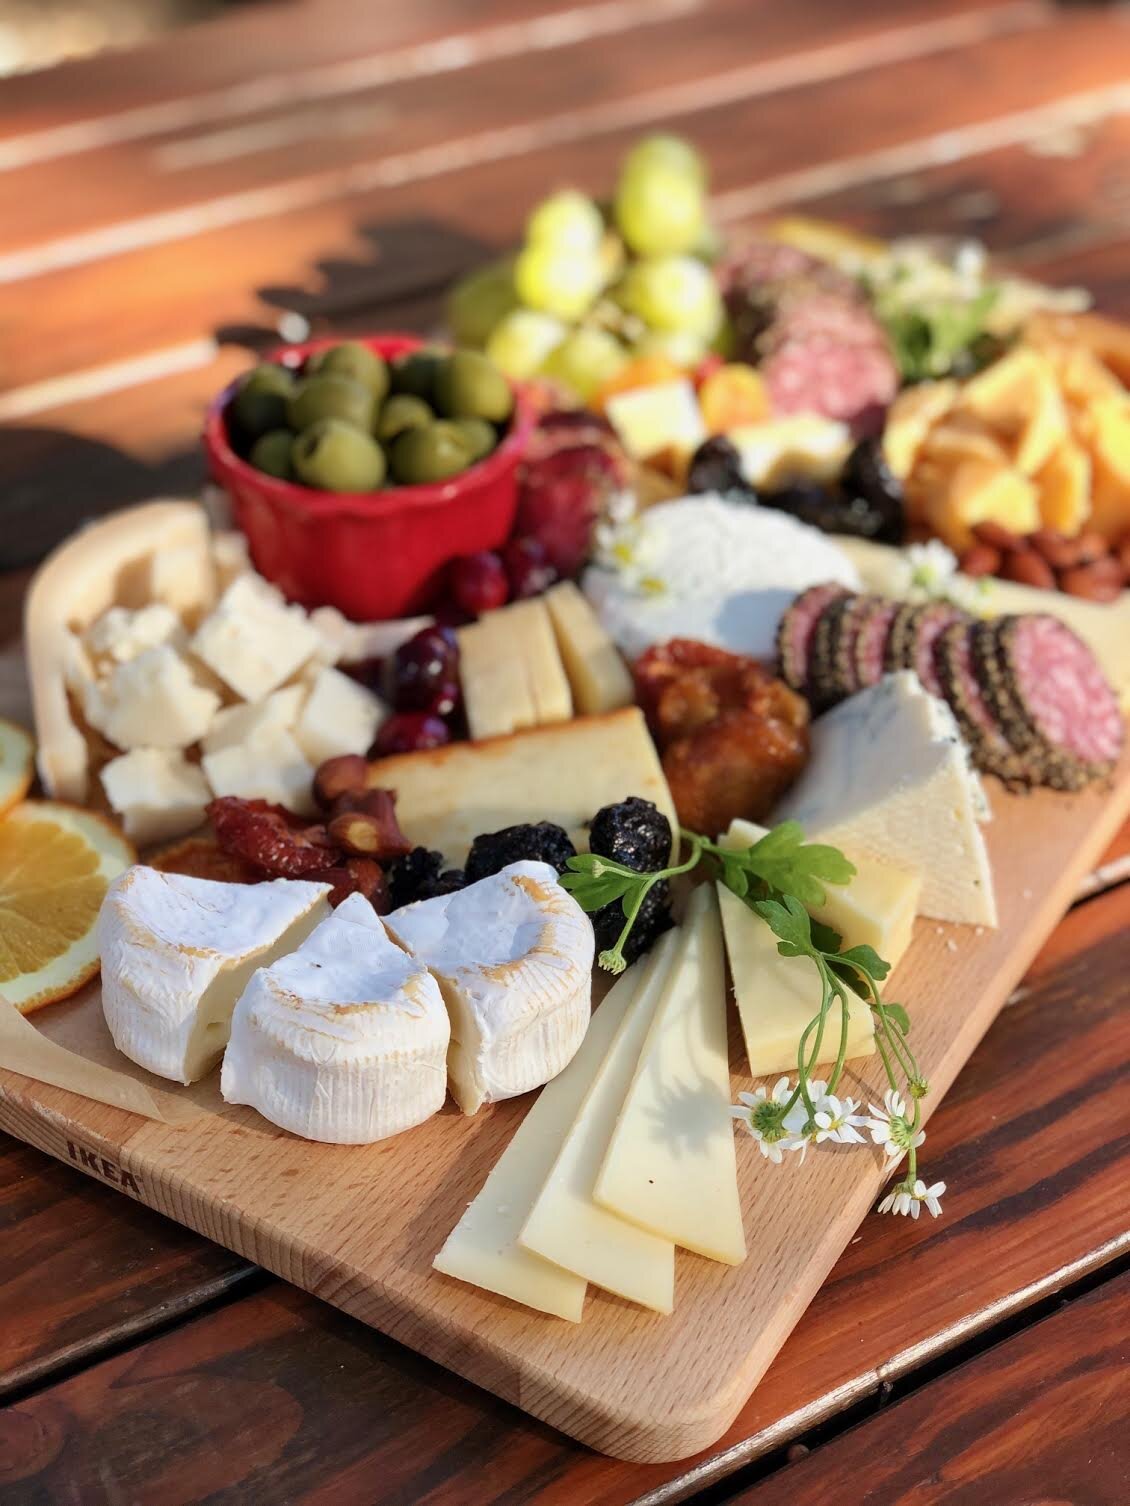
I’m sharing a few tips on how to make an easy holiday cheese board because… well, what’s more impressive than a beautiful spread of quality cheeses and charcuterie?! You can basically use what you have in the fridge and pantry to create a platter your guests and family will be raving about. Even if our gatherings are more intimate this year, let’s continue to make our meals and small gatherings special when we can! I like to fill my cheese board with my favorite cheeses, seasonal fruit, meats, olives and crackers to create the perfect appetizer.

I don’t know about you, but I love being welcomed in the door by a gorgeous cheese platter on the counter. It’s a way to gather around the kitchen table or island and catch up while the meal is being prepared. Plus, there’s always something for ever…

I don’t know about you, but I love being welcomed in the door by a gorgeous cheese platter on the counter. It’s a way to gather around the kitchen table or island and catch up while the meal is being prepared. Plus, there’s always something for everyone! I try to use a variety of cheeses (see suggestions below) so everyone is happy. There’s always some sort of creamy brie style cheese, a goat, a more firm gouda and then I like getting creative by throwing something truffle in there or something with heat or even something sweet.

The best thing is that they can be thrown together quickly and it’s a great last minute appetizer that your guests will love!

Here are a few cheeses we love and have at the shop currently!Dorothy’s Comeback Cow: A soft ripened cheese, similar to a brie that is a crowd pleaser. So creamy but still holds up well on a board. It’s rich and creamy and is shaped like a flower fo…

Here are a few cheeses we love and have at the shop currently!

Dorothy’s Comeback Cow: A soft ripened cheese, similar to a brie that is a crowd pleaser. So creamy but still holds up well on a board. It’s rich and creamy and is shaped like a flower for a unique design.

Beehive: The Hatch Chile (a favorite), Smoked Apple Walnut and Bourbon Infused. These cheeses are mild but add character to any cheese plate!

Point Reyes Bleu: Even if you’re not a huge bleu cheese fan, you must try this! It is ultra creamy with a peppery finish. Great for topping salads, melting on burgers or eating with strawberries, stone fruit or even castelvetrano olives.

Beemster Gouda- Might be my personal favorite cheese… ever. It’s nutty, buttery and rich and has some crystallization which makes it feel extra special. It is a little sweet with notes of brown-butter, toasted walnuts and pairs well with juicy fruit…

Beemster Gouda- Might be my personal favorite cheese… ever. It’s nutty, buttery and rich and has some crystallization which makes it feel extra special. It is a little sweet with notes of brown-butter, toasted walnuts and pairs well with juicy fruit and a hoppy beer or full-bodied white wine.

Point Reyes Toma Trufle- Give me all of the truffle! I personally love truffle everything but not everyone does. This is great because it’s mild but still rich and buttery that leaves you coming back for more. Semi hard, earthy and a true delight.

Cypress Grove- Soft ripened cheeses are our go-to’s! This goat cheese is mildly tangy, but still mushroomy and creamy. They have some unique flavor combinations like the citrus and lavender to wild fennel pollen. An unexpected delight in every bite.

Assembly can be whatever you make it but here are a few of my tips:Cheeses: Keep it simple! Stick to using 3-5 of your favorite cheeses. It can be tempting to go overboard but simplicity is best in my opinion. Try using cheeses that will be loved by…

Assembly can be whatever you make it but here are a few of my tips:

Cheeses: Keep it simple! Stick to using 3-5 of your favorite cheeses. It can be tempting to go overboard but simplicity is best in my opinion. Try using cheeses that will be loved by a variety of palates. Like a creamy brie, sharp cheddar or gouda, and some sort of goat cheese. You can find these options to be affordable as well!

If you’re serving a larger crowd, I suggest buying multiple wedges/blocks of the same cheeses so you can fill in the board with the same cheeses without it being overwhelming to your guests. Then the board is full and colorful!

Meats: I love a good quality charcuterie. Again, keep it simple by using a peppered salami that you know your family will enjoy and it will also hold up on a cheese board a bit better than prosciutto.

Spreads: Fig jam is usually always a must on my boards but a new favorite is tart cherry spread! I love a pop of color and something jammy to spread on my crackers to pair with the cheese

Fruits: Choose whatever is in season! Citrus in the winter, stone fruit in the summer and berries during the spring.. throw it on for color and a burst of juicy flavor. I also love dried fruit… dried cherries or dried pears have to be my favorites.

Olives and nuts: I’m a huge olive fan. Especially castelvetrano olives, they are mild and buttery and pair so well with so many cheeses. I highly suggest investing in them even though they’re a bit pricier. For nuts, do whatever you like. I personally love Marcona almonds or roasted pistachios. If you don’t use olives, add something pickled to add some acidity!

Finally, fill in the cheese plate with some crackers or thinly sliced bread. Serve at room temperature, a lot of people assume cheese should be served cold but the flavor is really best at room temp. Hopefully you’ll include a cheese and charcuterie board for your New Year’s celebration, cheers!

Print Friendly and PDFPrint Friendly